Create an Agent
Create a new AI agent declaratively through Redpanda Agentic Data Plane. No Python or JavaScript code required. This guide walks through the managed create canvas section by section, then covers how to connect to and test the running agent.
After reading this page, you will be able to:
-
Create a managed Agentic Data Plane agent through the create canvas
-
Configure an LLM provider, model, and tools for an agent
-
Connect to and test a running agent
Prerequisites
-
At least one LLM provider configured in Agentic Data Plane.
-
Optional: One or more MCP servers registered in Agentic Data Plane if you want the agent to call tools.
-
Optional: A system prompt prepared in advance (see System prompt best practices).
Open the create canvas
-
Open Agents in the sidebar.
-
Click Create agent.
-
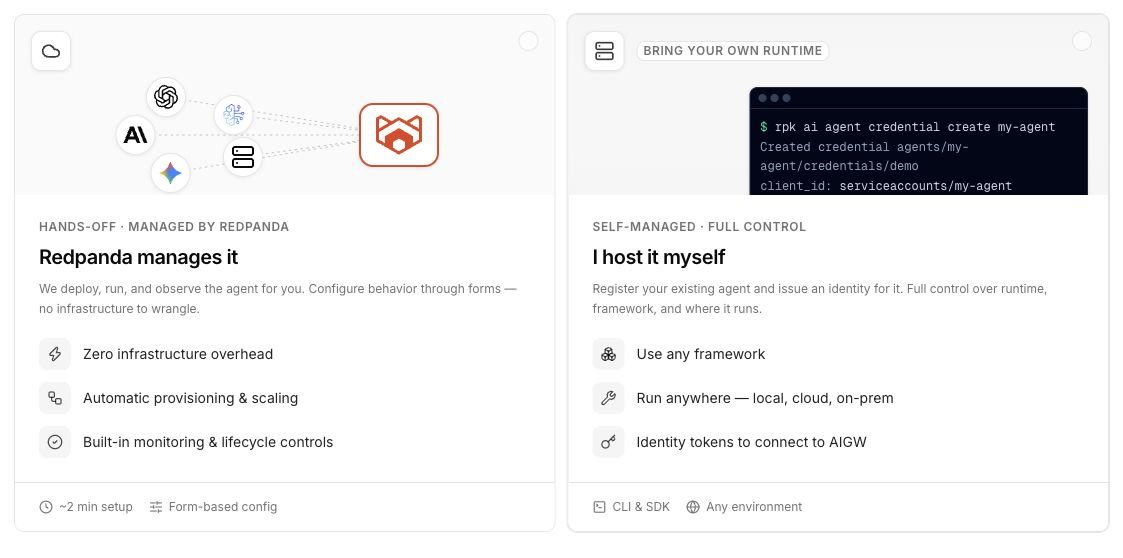
Choose how the agent runs. Click Redpanda manages it, so Redpanda deploys, runs, and observes the agent for you. (To run an agent you host yourself, see Set Up a Self-Managed Agent.)
Agentic Data Plane opens the New managed agent canvas: a single page with sections for Identity, Model, Instructions, and Tools, plus a collapsible Advanced area for subagents, tags, and transcript recording. Everything on the canvas is editable later from the agent’s Overview tab. Required fields are marked with an asterisk; the Create agent button stays disabled until you provide them, with helper text explaining what’s still missing.
Identity
In the Identity section, name the agent and optionally describe it.
-
Enter a Name. Required. Shown in the agent registry list and the detail header (for example,
Customer Support Agent). Agentic Data Plane derives the agent’s resource ID from this name when you create the agent; you don’t enter the ID directly. The derived ID is a lowercase slug that starts with a letter, ends with a letter or digit, and can contain letters, digits, and hyphens (up to 63 characters). The ID is used in URLs and CLI commands and can’t be changed after creation.Click Suggest a name to generate a placeholder you can edit. -
Optionally, add a Description. An internal note shown on the agent’s detail page. This is not the system prompt; write that under Instructions.
Model
In the Model section, choose the large language model (LLM) the agent uses to interpret user intent and decide which tools to invoke. The picker is a single searchable list of every model your configured LLM providers expose (for example, us.anthropic.claude-haiku-4-5-20251001-v1:0): search by name, select a model, and Agentic Data Plane routes to the provider that serves it. When the same model is served by more than one provider, the picker shows the provider next to the model so you can choose which one to use. To use a model the picker doesn’t list, select a provider’s Custom model ID entry and type the identifier. Calls to the model are proxied through the AI Gateway.
To add a new provider, see Configure an LLM provider. For model selection guidance, see Model selection guide.
For external model specifications and pricing:
|
Max iterations is not on the create canvas. It’s the upper bound on agent reasoning loops per request, and you set it after creation from the agent’s Overview tab, in the Model & runtime section. Leave it unset (or |
For an AWS Bedrock provider, Agentic Data Plane validates the model when you create or update the agent. A model ID that isn’t a valid Bedrock model for the provider’s region is rejected at save time, with an error that points at the offending model field, instead of being accepted and then failing later when the agent deploys. A common mistake is the bare foundation-model ID: Claude 4.6 and later require the full inference-profile ID (for example, us.anthropic.claude-opus-4-7 rather than claude-opus-4-7). To use a model the picker doesn’t list, select the provider’s Custom model ID entry and enter the full inference-profile ID. The same check applies to each subagent’s model override. See AWS Bedrock: Inference profiles and IAM.
A second check covers models the provider serves but hasn’t turned on: a model that isn’t enabled on the Bedrock provider is rejected at save time too, because the gateway refuses it on every request. Enable the model on the provider’s Models tab, or pick one it already serves. A provider created before model selection was required may still have no models selected; it serves whatever Bedrock accepts, so it rejects nothing here.
For a Claude model on an AWS Bedrock provider, a managed agent caps the output of a single model call at 16,384 tokens. This cap isn’t configurable, and a response that reaches it stops there, so a long answer can be truncated. The same cap applies to each subagent’s model override. Other Bedrock model families are unaffected.
Instructions
In the Instructions section, write the system prompt that defines the agent’s role, responsibilities, constraints, and output format. The system prompt is optional but strongly recommended; when set, it’s sent on every invocation as the first message. To start from a template, select one of the starter cards above the editor. Each card fills in a complete system prompt that you can then edit.
The field is a Markdown editor with three modes:
-
Live: The default. Styles the formatted Markdown as you type and reveals the raw syntax for the construct you’re editing.
-
Markdown: Always shows the exact source.
-
Preview: Renders the formatted result.
In either editing mode, type the prompt directly and use the formatting toolbar, or select the upload icon to import a Markdown file. To edit in a larger surface, click Expand editor.
A typical prompt defines:
-
Agent role and responsibilities
-
Available tools (matches the servers you select in the Tools section)
-
Safety rules and constraints
-
Expected output format
Example structure:
You are an [agent role].

Responsibilities:
- [Task 1]
- [Task 2]

Available tools:
- [tool_name]: [description]

Never:
- [Constraint 1]
- [Constraint 2]

Response format:
- [Format guideline]
For full guidance on writing effective prompts, see System prompt best practices.
Tools
In the Tools section, grant the agent access to the Model Context Protocol (MCP) servers that expose tools to it. This section is optional, and you can change the list at any time after creation.
-
In the server list, select the checkbox of each server you want the agent to call. If your organization runs many MCP servers, a Search MCP servers box appears above the list to help you find them. To create a new server instead of attaching an existing one, click Add MCP server, which opens the server-creation flow in a new tab.
-
The agent discovers each selected server’s tools at runtime; you don’t pre-select individual tools. The agent calls them based on the LLM’s interpretation of the system prompt and the user request. Keep the system prompt aligned with the servers you select so the model knows what’s available.
| Apply the principle of least privilege. Connect only the servers the agent needs. |
An agent can reference at most 32 MCP servers in total, counting the servers on the root agent plus every subagent’s servers. The limit counts references, not distinct servers, so a server referenced by both the root agent and a subagent counts twice. If the total exceeds 32, you can’t save the agent.
For registering MCP servers, see Create an MCP server.
Advanced: subagents, tags, and transcripts
Expand the Advanced area to add subagents and tags, and to choose how much of each conversation the agent records. Everything here is optional.
Subagents
Subagents are internal specialists within the same agent. Each subagent has its own name, delegation hint, system prompt, and MCP tools. By default, a subagent inherits the parent agent’s model, and in the UI you can override the model per subagent; the LLM provider is always inherited from the parent. (The API additionally accepts a per-subagent provider override, and requires a model to be set with it.) All subagents share the parent agent’s provider credentials, gateway endpoint, and execution settings. The root agent orchestrates and delegates work to the appropriate subagent based on the request.
To add a specialist, click Add subagent (or Add a subagent) and configure it in the panel that opens:
-
Name: Required. Must start with a lowercase letter, contain only lowercase letters, digits, and hyphens, and end with a letter or digit (for example,
researcher). The name must be unique among the agent’s subagents. -
When should the parent use it?: Required. The delegation hint the parent reads to decide when to route a task to this subagent. Be specific about inputs, outputs, and use cases.
-
Model: Optional. Defaults to the parent agent’s model. A subagent always uses the parent agent’s LLM provider, so you override only the model, choosing from the models that provider serves. Use Reset to inherited to go back to the parent’s model.
-
Instructions: Required. Domain-specific system prompt for what the subagent does.
-
Tools: Optional. Select the MCP servers this subagent can access.
Click Add subagent to save it, or Cancel to discard. To keep the agent flat, leave the list empty.
For multi-agent design patterns, see Agent architecture patterns.
Tags
Add Tags as key/value pairs to organize and filter agents in the registry and to break down Cost & Usage by team, environment, and more.
Transcript recording
Under Transcripts, choose how much of each conversation the agent records:
-
Full transcripts: The default. Records the agent’s messages, tool arguments, and tool results, along with the conversation timeline, latency, and token usage.
-
Metadata only: Records the conversation timeline, tool names, latency, and token usage only. The agent strips message and tool content, so prompts, responses, and tool inputs and outputs never reach the transcript.
-
Off: The agent records nothing. It exports no conversation traces, and its Transcripts tab stays empty.
This setting governs what the agent itself records. The message bodies that AI Gateway proxies to the model are controlled separately, by the provider’s own transcript settings. A new provider starts with recording on, whether created from the Create provider form, the CLI, or the API; a provider created with recording explicitly disabled, or created before recording became the default, does not record message bodies. To see the prompts sent to the model and the responses it returns, confirm the provider’s settings too. See Configure transcript logging.
The recording mode changes only what a transcript captures; it does not affect cost and usage reporting, which is the same in every mode. Change the mode at any time after creation from the agent’s Overview tab, in the Model & runtime section.
Create the agent
-
Review the canvas. The Create agent button is disabled until you enter a name and pick a model; the helper text next to it tells you which is still missing.
-
Click Create agent.
-
Wait for the agent to reach the Running state.
When the agent is running, open its detail page. A managed agent has these tabs:
-
Overview: The agent’s full configuration, organized into sections that you edit and save one at a time. The Agent section holds the display name, description, and tags (the agent ID is fixed). The Model & runtime section holds the LLM provider, model, max iterations, and the transcript recording mode, along with the runtime status and endpoint. The System prompt, MCP servers, and Subagents sections hold the instructions, attached servers, and subagents.
-
Triggers: Schedules and event sources that invoke the agent. See Trigger Agents.
-
Playground: An interactive test surface. See Test your agent.
-
Cost & Usage: Spend, tokens, and latency for the agent.
-
Transcripts: A record of the agent’s conversations, at the level of detail set by its transcript recording mode.
-
Permissions: The access policies that apply to the agent as a principal. See Manage Access Policies.
Connect to the agent
A running managed agent exposes an A2A endpoint that you can call programmatically or integrate with external systems.
-
A2A endpoint: The URL where the agent receives messages, provisioned after the agent starts. It is published in the agent’s card at
https://<your-agent-url>/.well-known/agent-card.json, and you can fetch it with therpk ai agent a2a cardcommand. -
Authentication: The agent card is public, but every other request to the endpoint requires an access token, sent as an
Authorization: Bearerheader. The caller also needs permission to invoke the agent. See A2A runtime permissions. -
Code examples: Call the agent with an official A2A client SDK (Go, Node.js, Python, and Java), with
curl, or with therpk ai agent a2a sendcommand.
For more about calling agents and integrating them with other systems, see Choose an Integration Pattern.
Update a managed agent
Change a managed agent’s configuration at any time after you create it, either in Agentic Data Plane or with the rpk ai agent update command. You can edit settings such as the model, system prompt, tools, and subagents. The agent ID is fixed and can’t change.
Updates roll out without interrupting the agent. Redpanda starts the new version and waits for it to become ready before it stops the old one, so in-flight and new requests keep reaching a running instance throughout the change.
Test your agent
Two tabs on the agent detail page support testing and observability:
-
Playground: Send test prompts interactively and inspect each step of the agent’s reasoning, tool calls, and responses. Use Playground during development and tuning. The composer shows the agent’s provider and model as read-only, so a test run always uses the agent’s saved configuration.
-
Transcripts: Records the agent’s conversations (prompt, tool calls, tool outputs, final response) at the level of detail set by its transcript recording mode. Use transcripts to audit production behavior.
To test the agent in Playground:
-
Open the agent’s Playground tab.
-
Enter a test prompt.
-
Verify the agent:
-
Selects appropriate tools
-
Follows the system prompt’s constraints
-
Returns the expected output format
-
-
Iterate on the system prompt, MCP tool selection, or model choice as needed.
For detailed observability strategies, see Monitor Agent Activity.
Example configurations
Use these configurations as starting points for common agent patterns.
Simple query agent
-
Model: GPT-5 Mini (fast, cost-effective)
-
Tools: Single MCP server exposing a
get_orderstool -
Use case: Customer order lookups
